Before you can use the interface, you will need to configure some settings.
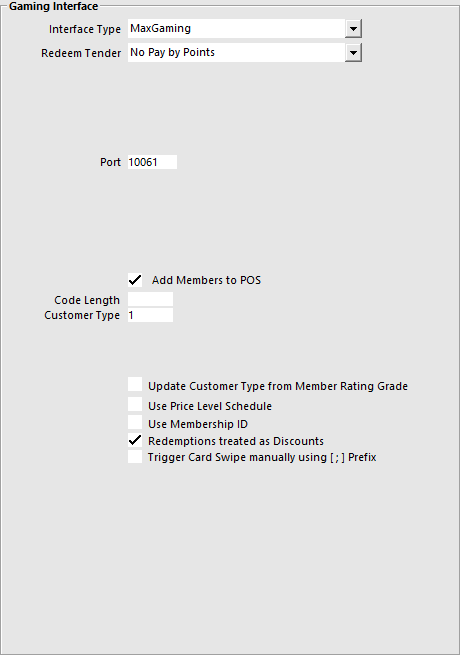
Go to Setup > Global Options > Interfaces > Gaming Interface.
Interface Type – MaxGaming.
Redeem Tender – Select the Tender that you created for Points.
Port – This will be provided by MaxGaming.
Add Members to POS – Select this field to add the members to the Idealpos Database if they are not already.
Code Length – This is the length of the Code that will be entered into the Idealpos database.
Customer Type – This is the Customer Type the new members will be added to in Idealpos.
Update Customer Type from Member Rating Grade – Using the Member Rating Guide within Max Gaming will adjust the Customer Type that is recorded in Idealpos. If this checkbox is selected the Customer will be added to the relevant Rating Customer Type, and not the default selected Customer Type.
Use Price Level Schedule – Check this if you want to use the Price Level Schedule function.
Use Membership ID – This will retrieve the MaxGaming Membership Number which will be used as the Customer Code if ‘Add Members to POS’ is selected.
Redemptions treated as Discounts – Toggle this setting on or off.
Trigger Card Swipe manually using [ ; ] Prefix - This setting will trigger any input received via the Keyboard Wedge which contains this prefix as a Card Swipe.
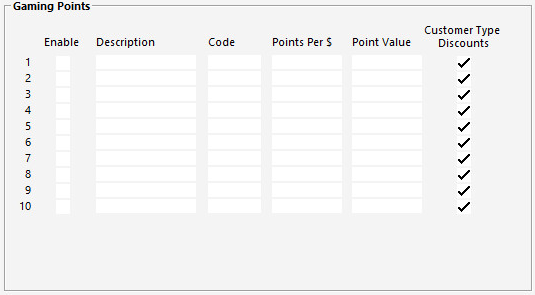
Go to Setup > Global Options > Gaming > Gaming Interface > Interface Type: eBet/Aristocrat/MaxGaming > Gaming Points.
The Customer Type Discounts checkboxes enable the ability to toggle Customer Type Discounts for each Gaming Points Bucket.
Gaming Points
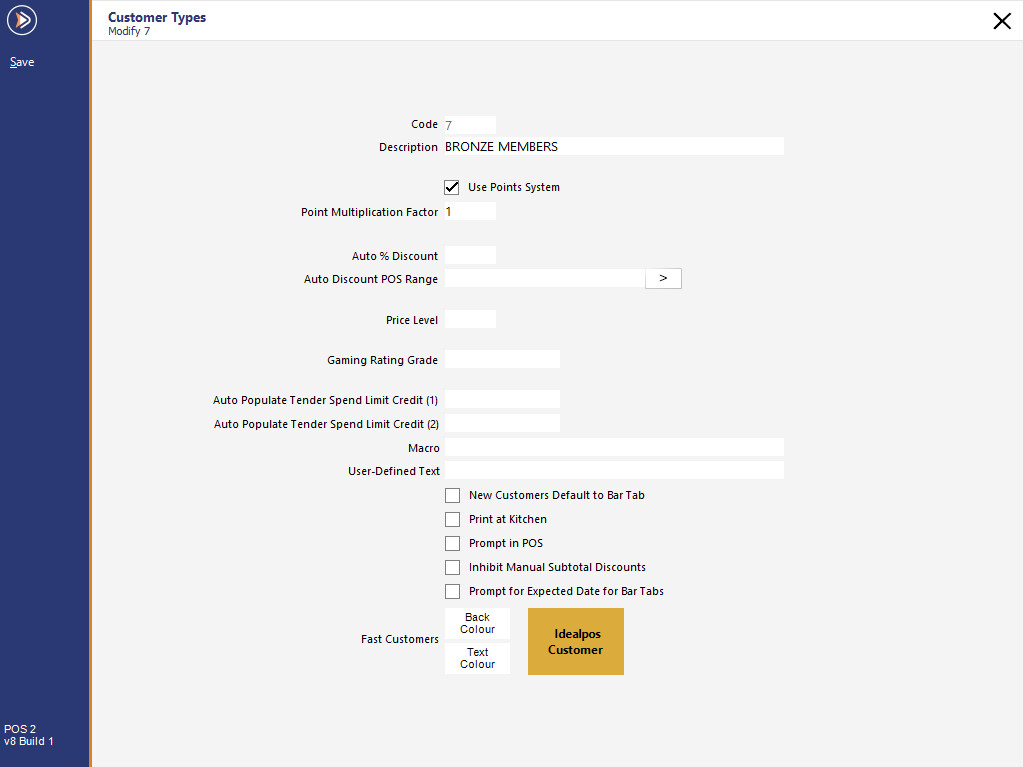
Max Gaming allows for Customers to be rated using the Member Rating Grade that has been pre-defined with the Max Gaming software.
These grades can be linked to Idealpos to ensure the grading is consistent.
Go to File > Customers > Customer Types > Add/Modify > Enter the “Gaming Rating Grade” that has been set in Max Gaming.
Promotions can be configured so that they only trigger for specific Max Gaming Membership Types.
To assign a Promotion to a specific Max Gaming Membership Type, you will need to identify the Membership Type ID from your Max Gaming system.
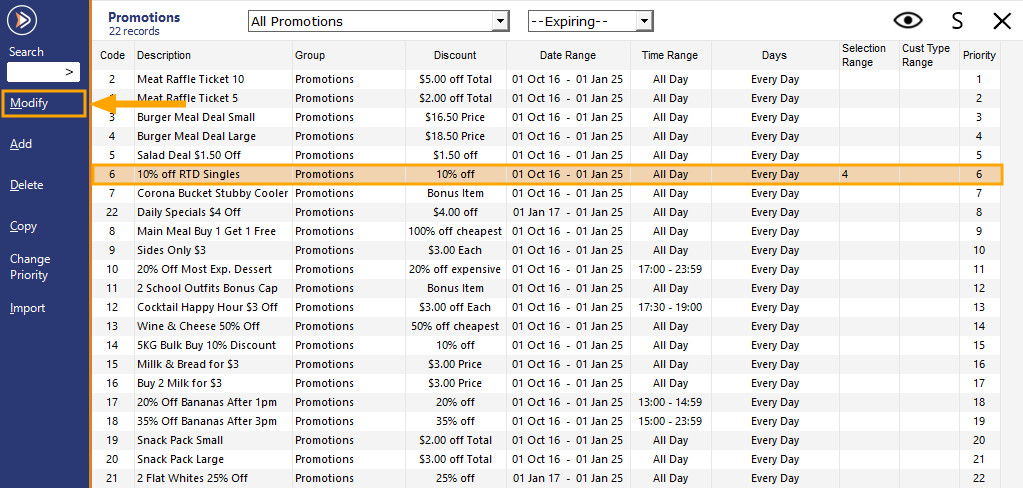
Then, go to: File > Sales > Promotions > Promotions.
Select the Promotion from the list > Modify.
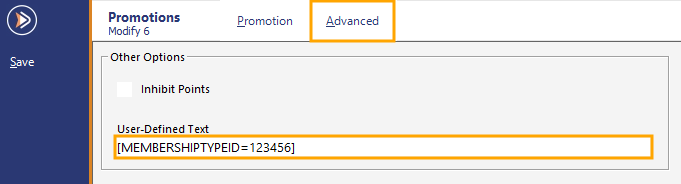
In the Advanced Tab of the Promotion, enter the following text into the User Defined field, ensuring that you substitute ID with the Membership Type ID as it is stored in the Max Gaming system.
[MEMBERSHIPTYPEID=ID]
E.g. If the Membership Type ID is 123456, you would enter [MEMBERSHIPTYID=123456]
To save the change, either press the "Save" button on the top-left corner of the screen (the button only appears on higher screen resolutions) or close the window.
When closing the window without pressing the Save button, a Save Changes prompt will be displayed.
Press "Yes" to save your change.

The Promotion will only apply to customers that are linked to the Membership Type ID that has been entered.
Max Gaming will provide you an IP Address for each terminal (usually a range from and to) for the number of terminals that you will be connecting to the interface.
These IP Addresses must be entered into the POS Terminals’ network communication settings and IPS Client.
On the terminal the IP Address from max Gaming must be entered in the Advanced Settings of the terminal.
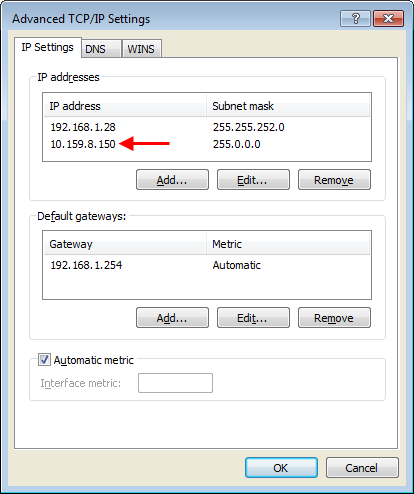
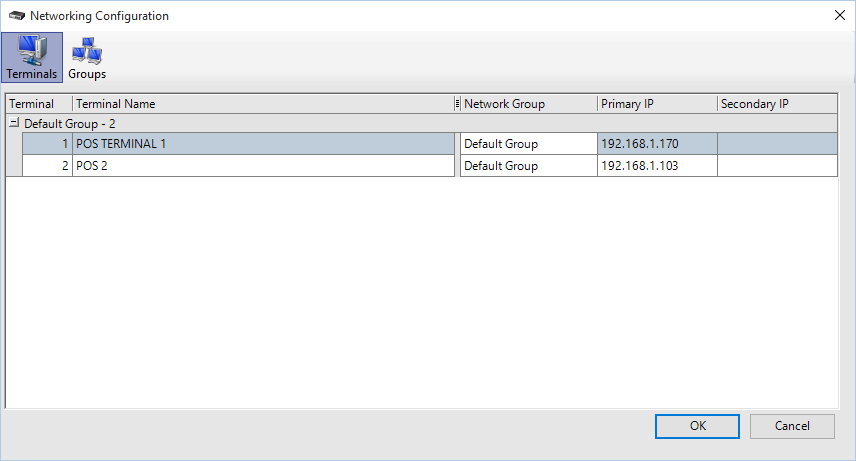
Enter the IP in the Primary IP field of IPS Client, and keep the original IP in the Secondary field.
If you are using an old version of IPS Client without Primary and Secondary IP’s, you will need to change the main IP Address.
You can configure the IP address in Idealpos two ways.
Go to Setup > Networking > Secondary IP.
Go to IPSClient > Network > Configuration > Secondary IP.